DIY Drawer Dividers: How to Make Simple Custom Dividers
A beginner project for odd-sized drawers: measure the inside of the drawer, cut thin wood strips or foam board to length and slot them into a snug grid that lifts out when your needs change.

At a glance
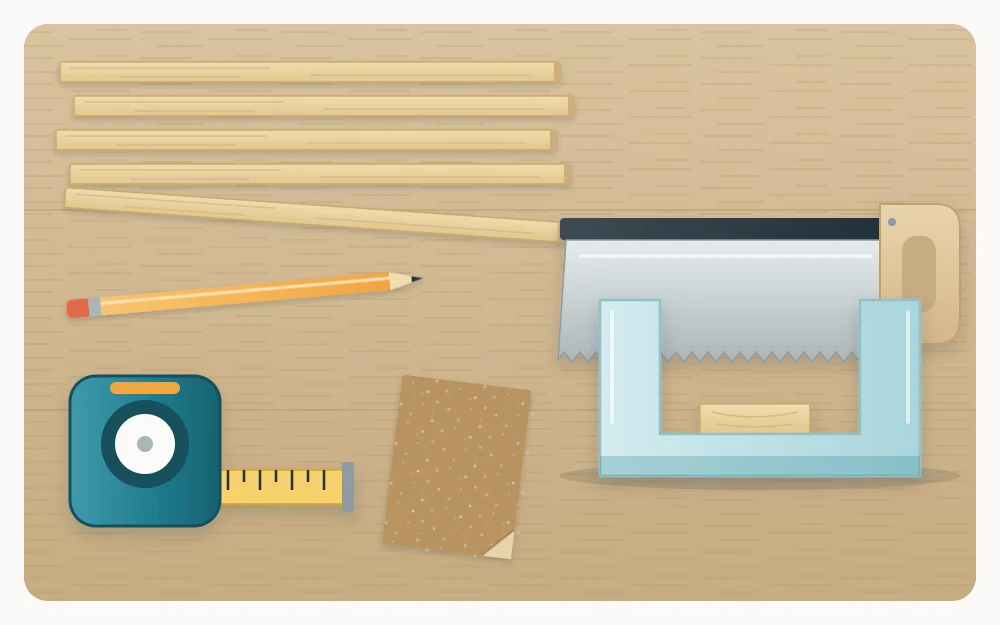
What you need
- Thin wood strips or foam board
- Tape measure and pencil
- Small hand saw with miter box
- Craft knife, metal ruler and cutting mat
- Fine sandpaper
- Wood glue (optional)
Store-bought organizers come in a handful of fixed sizes, and kitchen drawers do not. In an odd-sized drawer a ready-made tray leaves a gap along one side where things collect, or it does not fit at all.
Making your own solves that. DIY drawer dividers are a beginner project: thin strips cut to the exact inside size of your drawer and slotted together into a grid that holds itself in place by a snug fit. Nothing is fixed to the drawer, so the grid lifts out whenever you want to change it.
Choose a material
Two materials suit a first attempt.
Thin craft wood strips. Poplar or basswood hobby boards about 1/4 in (6 mm) thick are sold in craft and hardware stores. They are soft enough to cut with a small hand saw and stiff enough to stay straight. Choose a strip a little lower than the inside height of the drawer so nothing catches when it closes.
Sturdy foam board. It cuts with a craft knife, costs little and needs no saw. It is less durable than wood and dents more easily, but it suits light contents and is a quick way to test a layout.
Sizes vary between suppliers, so treat the thickness above as an example and work from the strips you actually have.
Gather materials and tools
- Thin wood strips or foam board
- Tape measure and pencil
- For wood: a small hand saw with a miter box, which guides the saw for square cuts
- For foam board: a sharp craft knife, a metal ruler and a cutting mat
- Fine sandpaper
- Wood glue (optional)
Good to know
Cutting is an adult job. Work on a stable surface, cut away from your body and keep your other hand clear of the blade. Change a craft knife blade as soon as it dulls, because a dull blade needs more force and slips more easily.
Plan the layout
The layout comes from what the drawer holds, so start there.
- Empty the drawer and lay out the items. Group them on the counter the way you want them stored. The groups show how many compartments you need and how long the longest tool is. If the drawer still needs sorting, the guide on organizing kitchen drawers step by step covers what belongs where.
- Measure the inside of the drawer. Take the inside length, width and height of the drawer box, not the front panel. Measure at the bottom and near the top, since some drawers taper or have rounded corners, and use the smaller figure.
- Sketch the layout. Draw the drawer as a rectangle and mark the dividers. A simple plan is two or three long dividers running front to back, with a few short cross pieces making smaller sections. Note each piece’s length on the sketch.
Keep the grid simple. Long lanes suit spatulas, whisks and tongs; one or two small squares suit measuring spoons and peelers. For help deciding which tools belong in a drawer at all, see the guide to organizing kitchen utensils.
Cut and assemble the dividers
- Cut the long dividers. Mark each one to the full inside length of the drawer and cut it. The aim is a snug fit: the strip should press lightly against both ends without bowing. Cut slightly long if in doubt, then trim or sand down.
- Cut the short cross pieces. For a slotted grid, cross pieces span the full inside width. For glued butt joints, each one is cut to the gap between two dividers.
- Sand the cut edges. A few strokes of fine sandpaper remove splinters and rough corners, so the edges are smooth to the touch. Foam board needs only a light pass, if any.
- Join the pieces. Use one of the two methods described below.
- Dry-fit, adjust and drop the grid in. Assemble the grid outside the drawer, lower it in and check that the drawer closes freely. Shave a little off any piece that is too tight. Leave the grid unglued to the drawer so it lifts out.
Half-lap notches
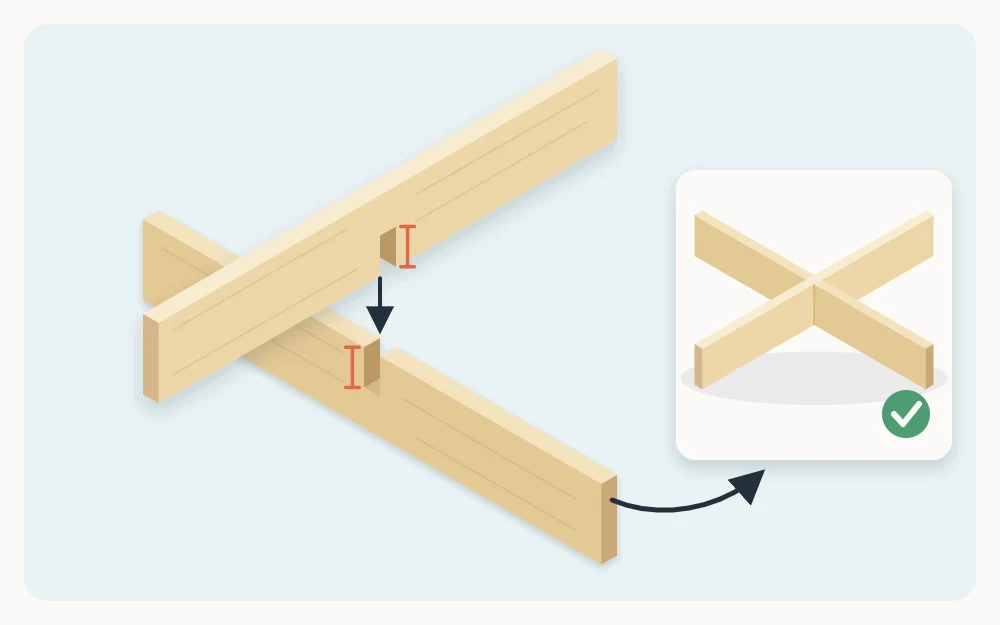
A half-lap joint lets two strips cross and sit flush. At each crossing point, cut a notch as wide as the strip is thick and halfway through its height: from the top edge down on one piece, from the bottom edge up on the other. The two notches slide into each other.
In wood, make two saw cuts to the halfway line and remove the waste between them. In foam board, make two knife cuts and lift the piece out. Mark both strips together so the notches line up.
Glued butt joints
If notches feel like too much, glue works. Stand the long dividers in position, put a thin line of wood glue on each end of a cross piece and press it between them. Keep the pieces square while the glue sets, and let it dry for as long as its label says before putting the grid to use.
Tip
Cut one test notch in an offcut first. It shows how wide the slot needs to be for your strips before you cut a full-length divider.
Finish, or leave it bare
Finishing is optional. Bare sanded wood works well in a drawer of utensils and can simply be wiped with a dry cloth. If you choose to seal the wood, follow the product label for application and drying, and let it cure fully before the grid goes back in the drawer.
Try the layout in cardboard first
If you are unsure about the layout, or would rather not cut wood yet, make a trial version. Cut strips of thick cardboard to the same lengths, snip slots halfway through where they cross and slide them together. Scissors are enough for most cardboard.
Use the trial grid for a week or two. If a compartment turns out too narrow or a lane too short, the fix costs nothing, and the cardboard pieces then become templates for the wood.
Where a custom grid helps most
A made-to-measure grid earns its keep in drawers no standard tray fits: very narrow drawers, extra-wide ones, and shallow drawers where a taller tray would catch.
The household utility drawer is a good example. Small squares for tape, batteries in their case and rubber bands are easy to plan on paper, and the guide to junk drawer organization explains how to sort that drawer before you measure it.
Whatever the drawer holds, knives should not go loose into a compartment. Keep them in a block, in an in-drawer knife holder or with blade guards on.
Frequently asked questions
What is the easiest material for homemade drawer dividers?
Foam board is the easiest to cut, since it needs only a sharp craft knife, a metal ruler and a cutting mat. Thin poplar or basswood strips take a small hand saw and a little more time, but they last longer and stay straighter. Thick cardboard works well for a trial layout.
How do you keep DIY drawer dividers from sliding?
Cut the long pieces to the full inside length of the drawer so they press lightly against both ends, and join them to the cross pieces so the grid holds its shape. A snug friction fit is usually enough. If a piece is slightly loose, a non-slip liner under the grid helps.
Do drawer dividers need to be glued into the drawer?
No, and it is better not to. Leaving the grid unglued to the drawer means it lifts out for wiping and can be changed when the contents change. Glue is only an option for joining the divider pieces to each other, following the drying time on the glue's label.