Junk Drawer Organization: Taming the Kitchen Catch-All
A catch-all drawer is worth keeping if it has a job and edges. Here is how to empty it, sort what stays, divide it into compartments and set a one-layer limit so it stays useful.

Almost every kitchen has one drawer that takes whatever has no other place to go. The scissors live there, along with the tape, a few pens, the spare keys and a tangle of things nobody remembers buying. It tends to be the most opened drawer in the room and the least pleasant to open.
Junk drawer organization is not about getting rid of that drawer. A kitchen needs a home for small household tools, and pretending otherwise only scatters them across the counter. The goal is to turn a dump into a defined utility drawer: a short list of useful things, each in its own compartment, in a single layer you can see at a glance.
Why a catch-all drawer is worth keeping
The kitchen is where packages get opened, notes get written and batteries get changed, so a handful of non-cooking items really do belong there. A typical utility drawer holds:
- Scissors and a roll of tape
- Pens, a pencil and a notepad
- Batteries and a small flashlight
- A tape measure
- Spare keys
- Rubber bands, twist ties and bag clips
- A few takeout menus
The trouble starts when the drawer has no rules. Without compartments and a limit, it accepts everything, and useful things sink under useless ones.
Empty it completely
Sorting inside the drawer does not work, because you cannot see what is at the bottom. Take the drawer out if it lifts off its runners easily, or scoop everything onto a cleared stretch of counter. Wipe out the empty drawer while you are there.
Then work through the pile in three passes:
- Trash first. Dried-up pens, dead markers, broken rubber bands, old receipts, expired coupons and mystery parts that have gone unidentified for a year can go. Test each pen on the notepad rather than guessing.
- Relocate what belongs elsewhere. Screws and tools go back to the toolbox, hair ties to the bathroom, charging cables to the desk. Collect these in a bowl and walk them to their rooms once, at the end.
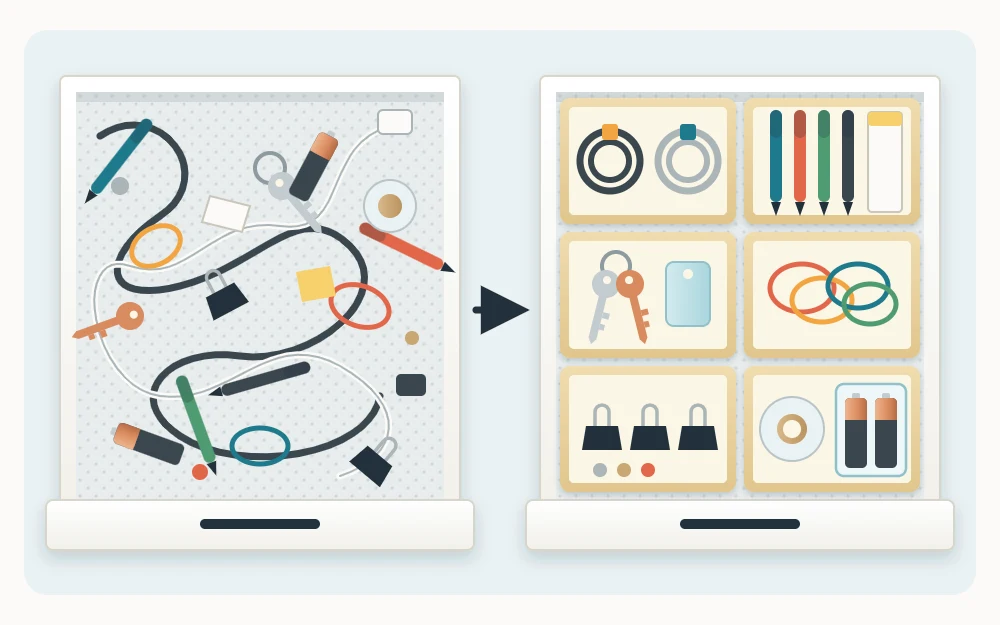
- Group what remains. Make small piles by purpose: cutting and sticking, writing, power and light, fastening, keys, paper.
The piles tell you how many compartments the drawer needs and roughly how big each should be. They also show duplicates: keep the best pair of scissors and send the spares to another room.
Divide the drawer to match the groups
A junk drawer fails without dividers, because small items slide into one heap every time the drawer is opened and closed. Shallow trays or small open bins, one per category, stop that.
Measure before you buy or make anything. Take the inside width, depth and height of the drawer box, not the drawer front, and write the numbers down. Junk drawers are often shallow, so height matters: a tray that stands taller than the inside of the drawer will catch on the cabinet frame.
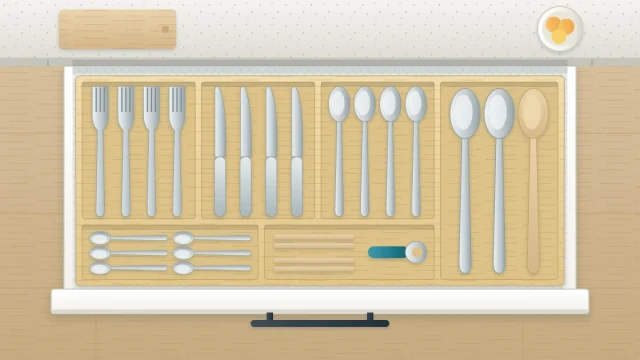
Choose trays that fill the floor of the drawer with as little gap as possible. Loose trays with space around them drift, and things fall into the gaps. A non-slip liner under the trays helps them stay put. The general approach to measuring and dividing is the same one used when you organize the rest of your kitchen drawers.
If the drawer is an odd size and no combination of trays fits, a grid cut to the exact inside dimensions is a tidy answer. The guide to making your own drawer dividers walks through that project.
Tip
Before buying trays, sketch the drawer floor on paper at full size and set your piles on it. Moving the piles around shows which compartment sizes you really need.
Leave one compartment for the miscellaneous
Some things resist categories: a single spare button, a furniture key, a bottle stopper. Give them one open compartment and accept it. A small, honest “miscellaneous” section is what keeps the other compartments clean. When it overflows, that is the signal to sort it, not to let it spill next door.
Set the limit: one layer
The simplest rule for this drawer is that it holds what fits in a single layer. If you have to lift one thing to find another, the drawer is over its limit.
A one-layer limit does the deciding for you. When something new wants in, either there is an open spot in the right compartment or something has to leave. That is the same idea as the one-in, one-out habit that helps stop kitchen clutter from building up again, applied to a very small space.
Paper is the usual offender. Menus, manuals and coupons stack up fast and bury everything else. Keep a few current menus flat in one compartment or standing at the back, and move appliance manuals to a folder in another room.
Store batteries with care
Loose batteries rolling among keys, paper clips and coins are a poor idea, because their terminals can touch metal objects. Keep batteries in their original packaging or in a small battery case, so the ends stay separated from each other and from anything metal.
Good to know
Follow the battery manufacturer’s storage advice printed on the package, and its directions for disposal. Used batteries should not go back into the drawer with new ones; set them aside for your local collection point.
Choose the right drawer for the job
Where the drawer sits matters as much as what is in it. In most layouts the best spot is at the edge of the kitchen, near the doorway or the end of a counter run, out of the cooking zone. People coming in for tape or a pen can get it without crossing in front of someone at the stove.
It also frees prime space. The top drawers beside the cooktop and the main prep counter are better used for cooking tools and cutlery. A shallow drawer suits a catch-all better than a deep one, since depth only invites a second layer.
Keep it from sliding back
A utility drawer drifts, because it is the easiest place to drop something. It does not need a schedule so much as a trigger: when it stops closing easily, or when you have to dig, give it a quick clear-out.
That clear-out is short once the compartments exist. Pull out the trash, return the strays to their rooms and put each item back in its section. Depending on how busy the household is, that may be needed every month or two, or only a few times a year.
Frequently asked questions
What should be kept in a kitchen junk drawer?
Keep small household tools that get used in or near the kitchen: scissors, tape, pens, a notepad, batteries in a case, a flashlight, a tape measure, spare keys, rubber bands and bag clips. Anything that has a proper home in another room, such as tools or charging cables, is better returned there.
How do you stop a junk drawer from getting messy again?
Give every category its own tray and hold the drawer to a single layer. When something new arrives, it needs an open spot in the right compartment or something else has to leave. Do a quick clear-out whenever the drawer stops closing easily or you find yourself digging.
Is it okay to keep loose batteries in a junk drawer?
It is better not to. Loose batteries can have their terminals touch keys, clips or other metal objects. Keep them in their original packaging or a small battery case, follow the manufacturer's storage advice on the package, and set used batteries aside for your local collection point.