Vertical Kitchen Storage: Using Walls, Doors and Cabinet Height
Where height goes unused in a kitchen and what to add in each spot: risers and baskets inside cabinets, rails and ledges on walls, racks on doors, and the rules that keep heavy things low.

When a kitchen feels full, the shelves usually are not. Look inside a cabinet and you will often find a short stack of plates with a wide band of empty air above it. The floor area is used up; the height is not.
Vertical kitchen storage means putting that unused height to work: inside cabinets, on walls and the backsplash, on doors and cabinet sides, and in the space above. Each spot suits different things, and a few plain rules keep the result sensible rather than cluttered or risky.
Inside cabinets: the biggest gain
Start here, because it needs no drilling and changes the most. Four additions do the work:
- Shelf risers. A riser is a small freestanding shelf that splits one tall space into two levels, so bowls sit above plates instead of on top of them.
- Under-shelf baskets. These slide onto the shelf above and hang below it, catching light items such as wraps, cloths or small lids.
- An extra shelf. Many cabinets have spare peg holes in the side walls. Where yours does, a matching shelf and pegs from the cabinet maker add a full level.
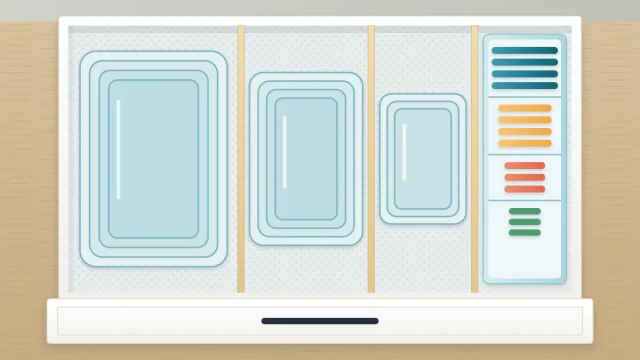
- Dividers for storing on edge. Baking sheets, cutting boards, trays and platters take less room standing upright in a rack than lying in a stack, and each one slides out without lifting the rest.
Measure the inside height, width and depth of each cabinet before buying, and allow for the door hinges and any center frame. A riser that is a fraction too tall wastes the level it was meant to create.

Walls and the backsplash
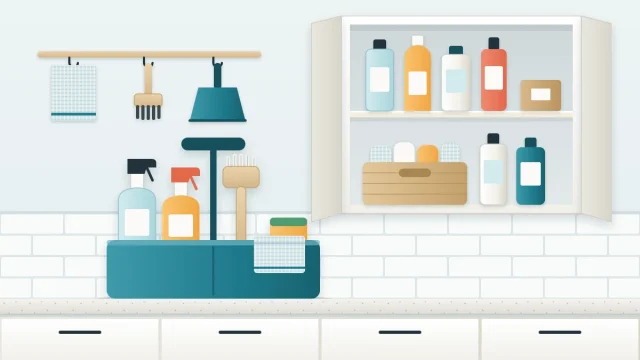
The strip of wall between the countertop and the upper cabinets, and any bare wall beyond it, can hold the tools you use daily.
- A rail with hooks for tools with a hanging loop, mugs or a small colander.
- A magnetic knife strip, properly mounted, which frees a drawer or a block’s worth of counter.
- A pegboard with movable hooks, useful where the collection changes.
- A slim shelf or ledge for a few everyday items such as glasses or small jars.
Whether a rail, a crock or a drawer is the better home for your spatulas and spoons is a question of its own, answered in the guide on how to organize kitchen utensils.
Open wall storage is always on view and gathers grease and dust faster than a closed cabinet. Hang what you use often and keep the rest behind doors.
Doors and cabinet sides
Doors are flat, empty and already there.
- Over-door racks hook over the top of a room or closet door and need no fixings, though the door must still close.
- Slim racks inside cabinet doors hold wraps, lids or cutting boards. Check that the rack clears the shelves and their contents when the door shuts.
- Hooks on the side of an end cabinet take an apron, a dish towel or a dustpan, provided that side does not face the cooktop.
If you rent and cannot drill, many of these have removable versions. The guide to organizing a rental kitchen covers what can be added and taken away without marks.
Above: the highest spaces
The top of the upper cabinets and the cabinet over the fridge are real storage, but awkward. Reserve them for light, rarely used items: a party platter, seasonal cookie cutters, spare paper napkins in a lidded bin. Reach them with a stable step stool, not a chair.
Bins with lids keep dust off and let you lift a whole group down at once. Nothing heavy, breakable or needed weekly belongs up there.
Which spot suits what
| Spot | What to add | What suits it |
|---|---|---|
| Inside upper cabinets | Shelf riser, under-shelf basket, extra shelf | Plates, bowls, mugs, light packets |
| Inside lower cabinets | Upright dividers | Baking sheets, boards, trays |
| Backsplash and wall | Rail with hooks, magnetic strip, pegboard, ledge | Daily tools, knives, a few glasses |
| Doors and cabinet sides | Over-door rack, door rack, hooks | Wraps, lids, aprons, dish towels |
| Top of cabinets, over the fridge | Lidded bins | Light, rarely used items |
Rules that keep it sensible
Storing upward changes how weight is carried, so a few rules apply everywhere.
- Heavy things stay low. Cast iron, stacks of dishes and full bins belong in lower cabinets and drawers, not on a ledge or a high shelf.
- Follow the stated limit. Every rail, shelf, rack and basket has a limit set by its maker. Use that figure and the fixing instructions that come with it.
- Match the fixing to the wall. The right anchor depends on the wall type. If you are unsure what is behind the surface, ask someone qualified before drilling.
- Use adhesive hooks for light items only, and only on the surfaces their instructions allow.
- Secure tall furniture. A freestanding shelf unit should be fixed against tipping as its maker describes.
Good to know
Keep the wall area around the cooktop free of anything that can burn or melt, including dish towels, wooden tools, paper and plastic. Rails and shelves should not sit directly over the burners. The National Fire Protection Association’s cooking safety page has general guidance on keeping the cooking area clear.
Where to start
Work from the least effort to the most. Fit risers and upright dividers first, since they cost little and need no tools. Then look at doors. Add wall fixings last, and only for things that have earned a place in view.
Stop when retrieval gets harder. If you must move two things to reach a third, or a stack is so tall that the bottom item never comes out, the space is over-filled rather than well used. In a compact room this balance matters most, and the guide to small kitchen organization sets out the wider strategy that vertical storage is one part of.
Frequently asked questions
What is the easiest way to add vertical storage in a kitchen?
Start inside the cabinets. A shelf riser or an under-shelf basket needs no tools and splits one tall space into two usable levels. Storing baking sheets and cutting boards on edge in an upright rack is another quick change. Measure the inside of the cabinet before buying anything.
Can I store things on top of the upper cabinets?
Yes, for light items you rarely need, such as a party platter or seasonal pieces, ideally in lidded bins that keep dust off. Use a stable step stool to reach them. Heavy, breakable or frequently used items are better kept low, where lifting them is easier.
Are adhesive hooks strong enough for kitchen tools?
That depends on the hook and the surface. Each product states its own limit and the surfaces it suits, and kitchens add steam and grease. Use adhesive hooks for light items only, follow the instructions exactly, and choose a fixed rail for anything heavier.